Documentation This documentation applies only to iceScrum v7.
For old iceScrum R6, read the documentation or migrate.
-
1 - Install or Upgrade
-
2 - Getting started
-
3 - Core features
4 - Apps & integrations
Neatro
Companion
MURAL
Microsoft Teams
Discord
iObeya
Zoom
Google Hangouts Meet
Jamboard by Google
Miro
Jitsi Meet
Mattermost
Custom project dashboard
Agile KPIs
Webhooks
Forecast
Agile fortune
SAML Authentication
Labels
Share
Zapier
Story workflow
FeatureMap
Time tracking
Diagrams & mockups
Epic stories
Portfolio
Project Roadmap
Toolbox
External authentication
Continuous integration
Cloud attachments
Team capacity
Bug trackers
LDAP / Active Directory
Slack
Project administration
User administration
Server administration
Git & SVN
Data export
Mood
Excel import
Task responsible
Story vote
Story template
Apps & integrations
Custom Backlogs
-
5 - Migration
-


Continuous integration (CI) plays an important role in agile development. iceScrum integrates build information from your CI server so you don’t have to leave iceScrum in order to check that your builds pass. This integration also allows traceability between stories and the builds in which they are implemented.
Principles
iceScrum provides a generic data structure to store build information. It is sent by a CI server through the iceScrum Web Services API. For Jenkins/Hudson and Travis CI, we provide apps to do that automatically:
Builds, jobs and project
Build information is sent when your CI server constructs your application by following instructions described in a job.
Build information mainly describes the build name, number, date, job and status. When sent to iceScrum, build information must be associated with a project (you can associate several jobs with a project). iceScrum knows that builds belong to the same job according to the job name that is provided.
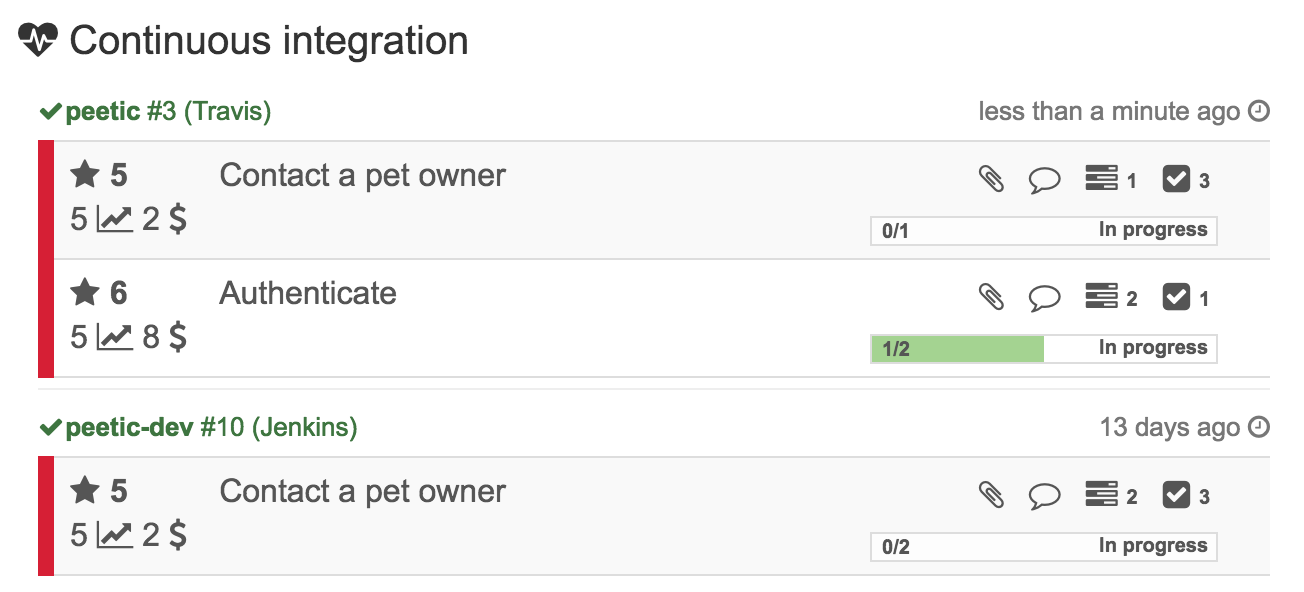
The Dashboard displays the latest build information for each job associated with the project. On the left, the job name is displayed. The build name color depends on the build status. You will get more information by hovering over it.
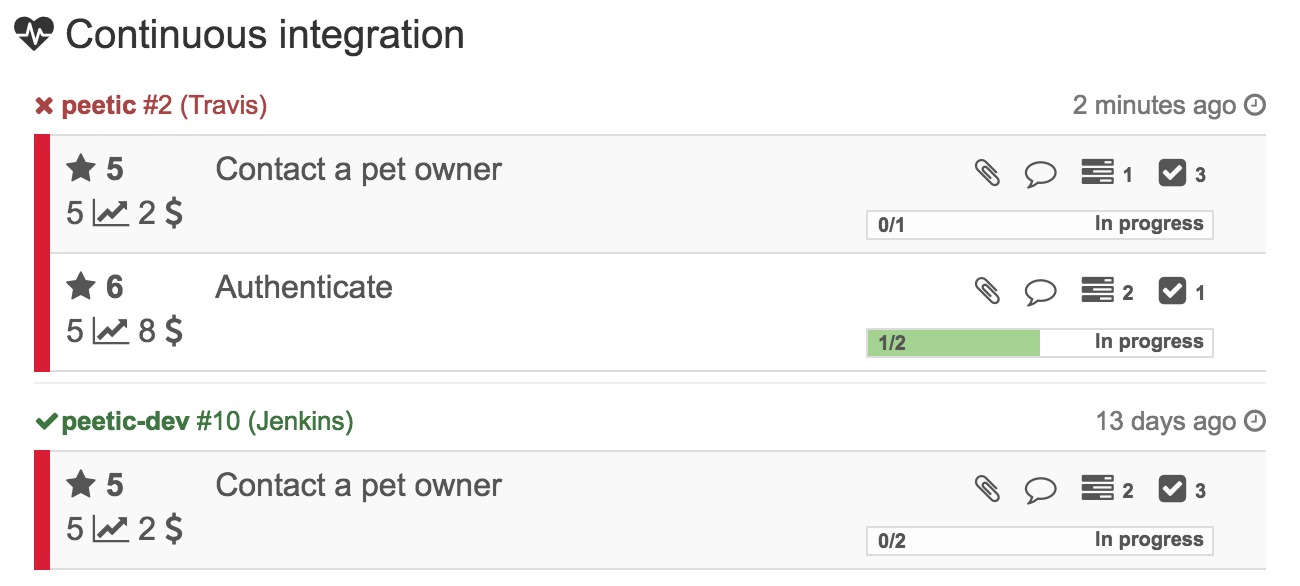
Builds, tasks and stories
Within a project, build information are displayed with one or many stories. The stories are displayed with the build if they include one or more tasks associated with this build number.
Build information is also displayed in task and story details views according to this association. Unlike the dashboard information which displays only the latest build per job, all the associated builds are displayed.
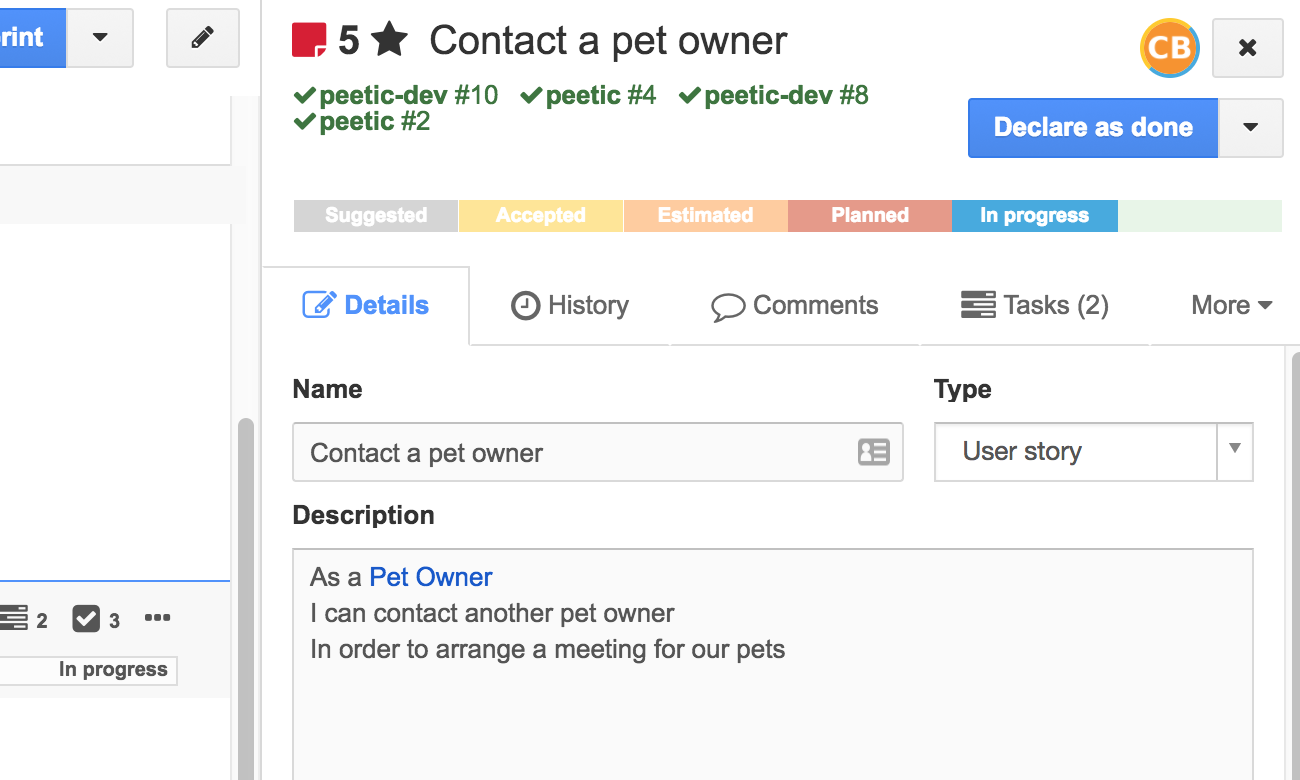
The continuous integration plugin includes tasks in build information if they are found in commit messages according to this pattern: T<taskUID>[-<taskEstimation>]. This pattern is the one we defined for SCM integration. Consequently, if you already use this iceScrum feature, builds will be associated with your tasks automatically.
The next sections describe how to configure the integration with your CI server. At the moment both Jenkins and Travis CI are available out of the box. If you would like to have a new plugin developed by our team, please contact us. Let us know if you develop one on your own so we may consider making it available for everybody.
Jenkins App
This section describes how to link iceScrum with your Jenkins server.
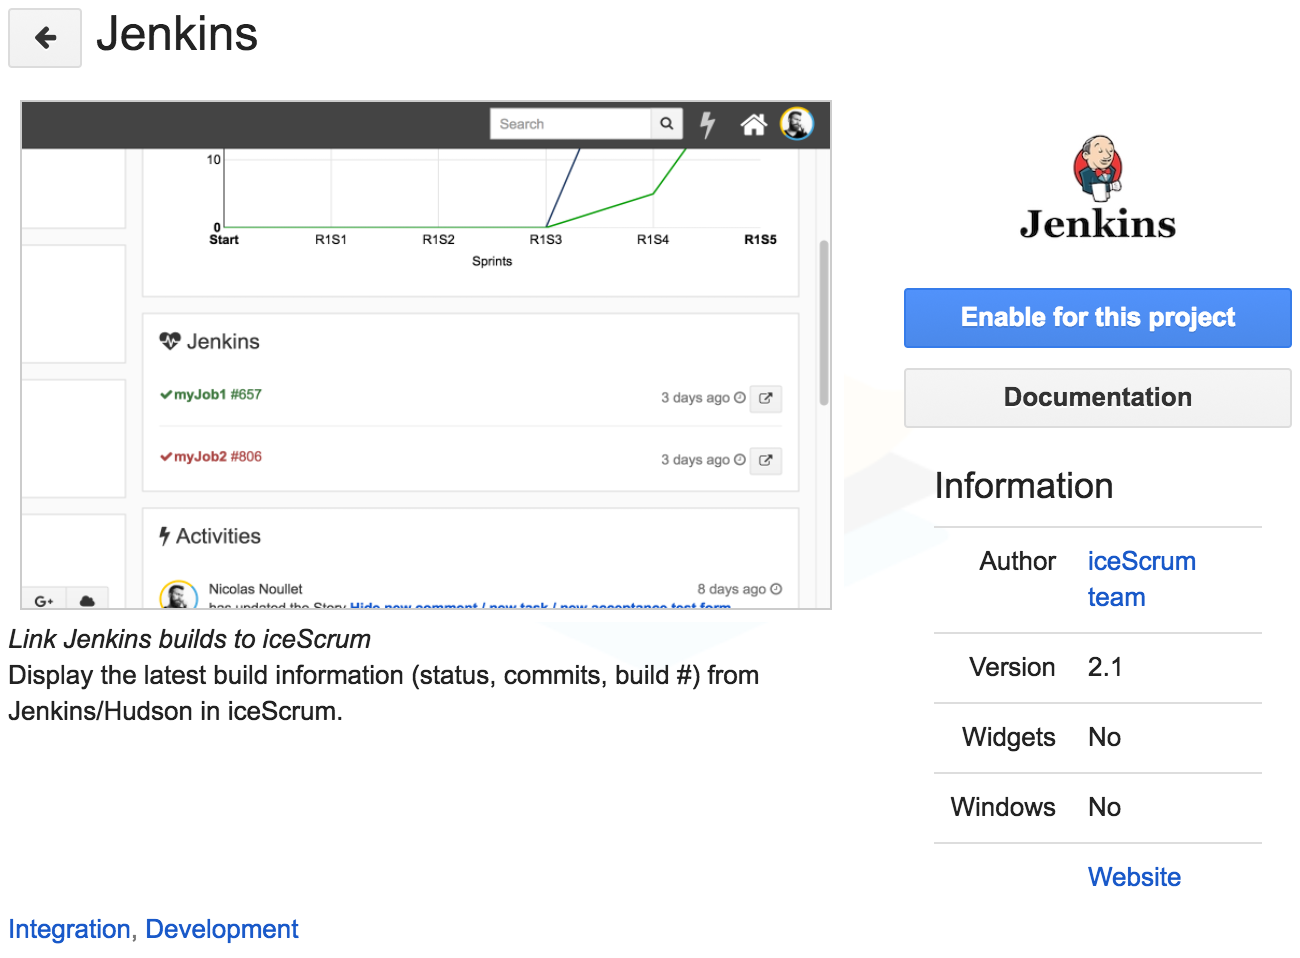
iceScrum configuration
The only configuration to make on your iceScrum project is to enable the Jenkins App.
Only freestyle projects are supported at the moment, Jenkins Pipelines support is not available yet.
Jenkins plugin configuration
If you use Jenkins, you can install the iceScrum plugin directly from the Manage Jenkins > Manage Plugins menu. You will find it under the Available tab (it is named iceScrum plugin). Choose Download now and install after restart.
If you use Hudson, you will have to install the plugin manually. Download the latest icesrum.hpi file into the $HUDSON_HOME/plugins directory and restart Hudson.
Once your Jenkins server is restarted, you can configure the connection to iceScrum in the iceScrum settings panel of your job configuration.
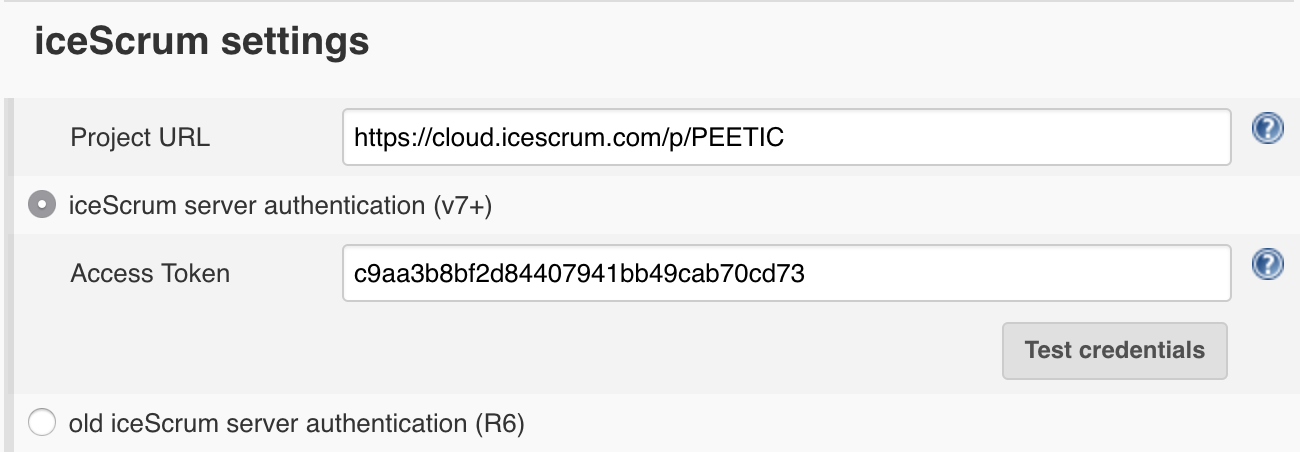
Enter your project URL:
$server/p/$project
If you use iceScrum Cloud, the URL will be:
https://cloud.icescrum.com/p/$project
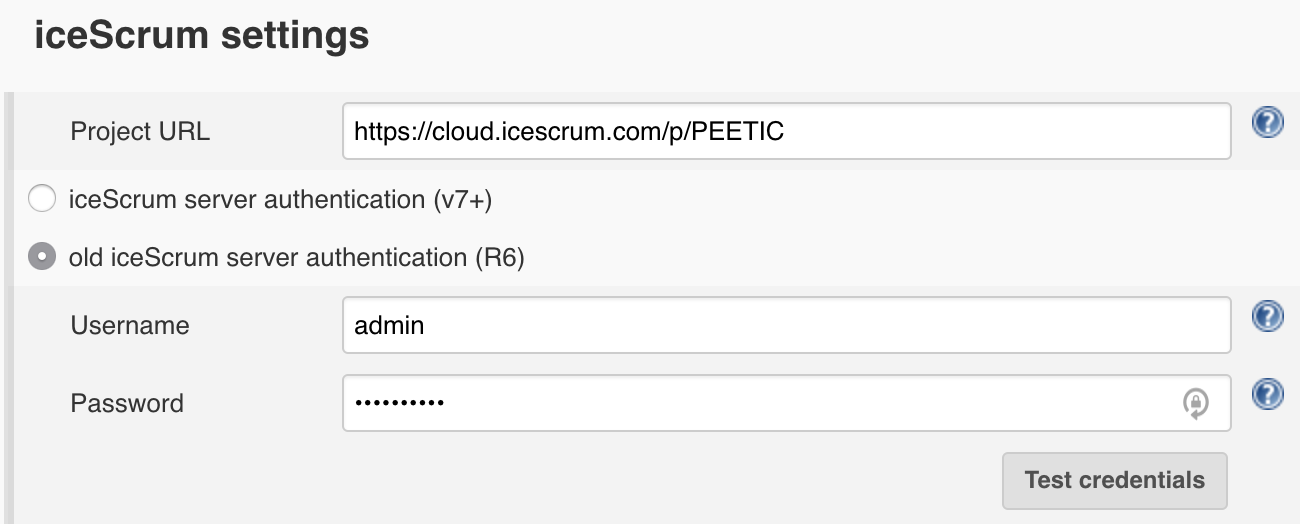
Authentication:
- iceScrum now uses API tokens for web service authentication. Learn to generate an iceScrum API token.
- For legacy R6 version, you can also enter credentials of a user who is in your team.
- In both cases, before going further, check your credentials with the Test credentials button.
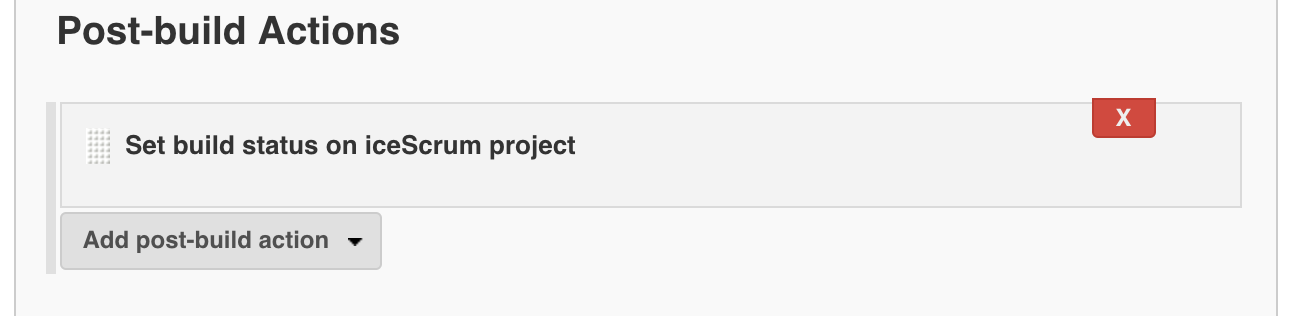
Finally, add the iceScrum post-build action that will send your build data to your iceScrum server.
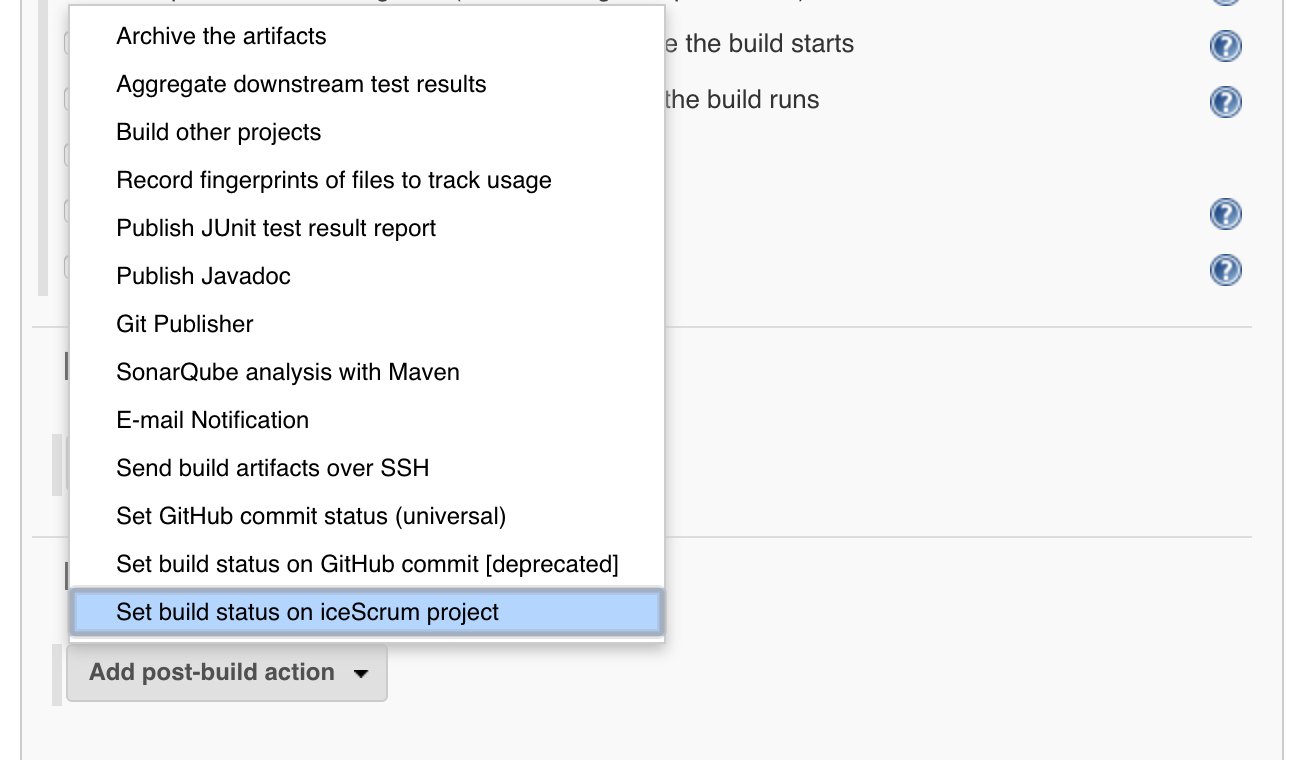
If you have multiple jobs for your iceScrum project, don’t forget to add the post-build action to all of them. Then, the plugin will automatically send build data to your iceScrum project for each build that includes commits with the iceScrum task naming pattern.
Travis CI App
This section describes how to link iceScrum with your Travis CI server.
iceScrum configuration
The only configuration to make on your iceScrum project is to enable the Travis CI App.

Travis CI configuration
Configure a webhook
In order to notify iceScrum of Travis CI build status, you need to add a webhook notification to the .travis.yml file of your project.
language: groovy
notifications:
  webhooks:
    urls:
      - https://cloud.icescrum.com/ws/project/PEETIC/build/travis?icescrum-token=dad27aff397bfes32fdab987
    on_failure: always
    on_start: never
    on_cancel: always
    on_error: always
The webhook URL is built this way :
$server/ws/project/$project/build/travis?icescrum-token=$access_token
- server: the URL of your iceScrum server. For iceScrum cloud instances it is
https://cloud.icescrum.com
- project: your iceScrum project ID or key
- access_token: iceScrum API access token. Learn to generate an iceScrum API token.
Here is a sample webhook URL for cloud project PEETIC :
https://cloud.icescrum.com/ws/project/PEETIC/build/travis?icescrum-token=dad27aff397bfes32fdab987
Read more about webhook notifications in the Travis CI official documentation.
Secure your api token:
The urls parameter should be secured as it contains an iceScrum token. Travis CI let you encrypt variables in the .travis.yml file of your project.
# gem install travis
$ cd ~/pathtoproject/myproject
$ travis encrypt '$server/ws/project/$project/build/travis?icescrum-token=$access_token'
Then insert the result in the .travis.yml file of your project.
A dash remains needed before the “secure: ” declaration, as it was not part of the encrypted string.
language: groovy
notifications:
  webhooks:
    urls:
      - secure: "i3Lq3diKBsskZL5QAnNMwYhMjG7MkApeFORj1HfZAwbbFynESB4ZpRQuMbMmKuFm61H/hgVaXfSvHxREfJZEKf71Le1jBYYdnsMZolOvi3NFlFZ5NZMOmsGm9csoJbXxvDGbmg8N6+ecaE/D/6tHPBlO1Hjd5WyqfDRMEl7VmsA258rOj7PHzY0ne+kRUgIc0Q5DYxfVoh2oHs6FSJHDLKJJHwUqrLDSy9lJHJyBjJZUHvRtycavXKvWE9r0zqE2TR1amKFa7YXWseppSvjUOkAwgOx6GXcwzX2ror6X8akns26GY46NvdYlVDzWIw9ArgoUKJF6VM/3wn23CgEMUlDy10w3eSR4Tnni107MzkO7wn+Ovy+xJP/wyZnJYmsgSUyGnERvAkjIHsDOkqCtEbDQbsvS4ggyogATBkLRqsRGPZKrrN/6CQX8Stl67AztFT79pb4Iijd0fJIOag3nkF0m5/dEgHHtsKEMgvHf5CF9T7EEJfVhqbQuv072rIc3CXUkkK3+5196EcnZIzRyx20cblEkTbVx+zMtFI8vg7QsSFdR9NEf3p1uwH5RGzdj6FWJ/jQUoM2i9Sv+Z9rRYUQo0rXDld9inJh26BjTvRkzf4ZDjyISAcbKiz2yZBTiCJh9UGyWCXmw8OP+vBhKTBvHnOYdCzkDAbSh1nw="
    on_failure: always
    on_start: never
    on_cancel: always
    on_error: always
Read more about encryption in the Travis CI official documentation.
Visual Studio Team Services CI App
- VSTS work items: Create iceScrum stories from VSTS work items.
- VSTS CI: Link VSTS builds to iceScrum.
- VSTS code: Link VSTS commits to iceScrum tasks.
This section describes how to link iceScrum with your Visual Studio Team Services CI service.
iceScrum configuration
The only configuration to make on your iceScrum project is to enable the Visual Studio Team Services CI App.
VSTS configuration
First you need to install iceScrum extension for Visual Studio Team Services from Visual Studio Market Place.
Then add the notify iceScrum task to your existing build definitions. Go to the Build and Releases menu, edit a build definition, and add a task to the phase. You will find the iceScrum build task by searching “iceScrum” or by browsing the Utility section.
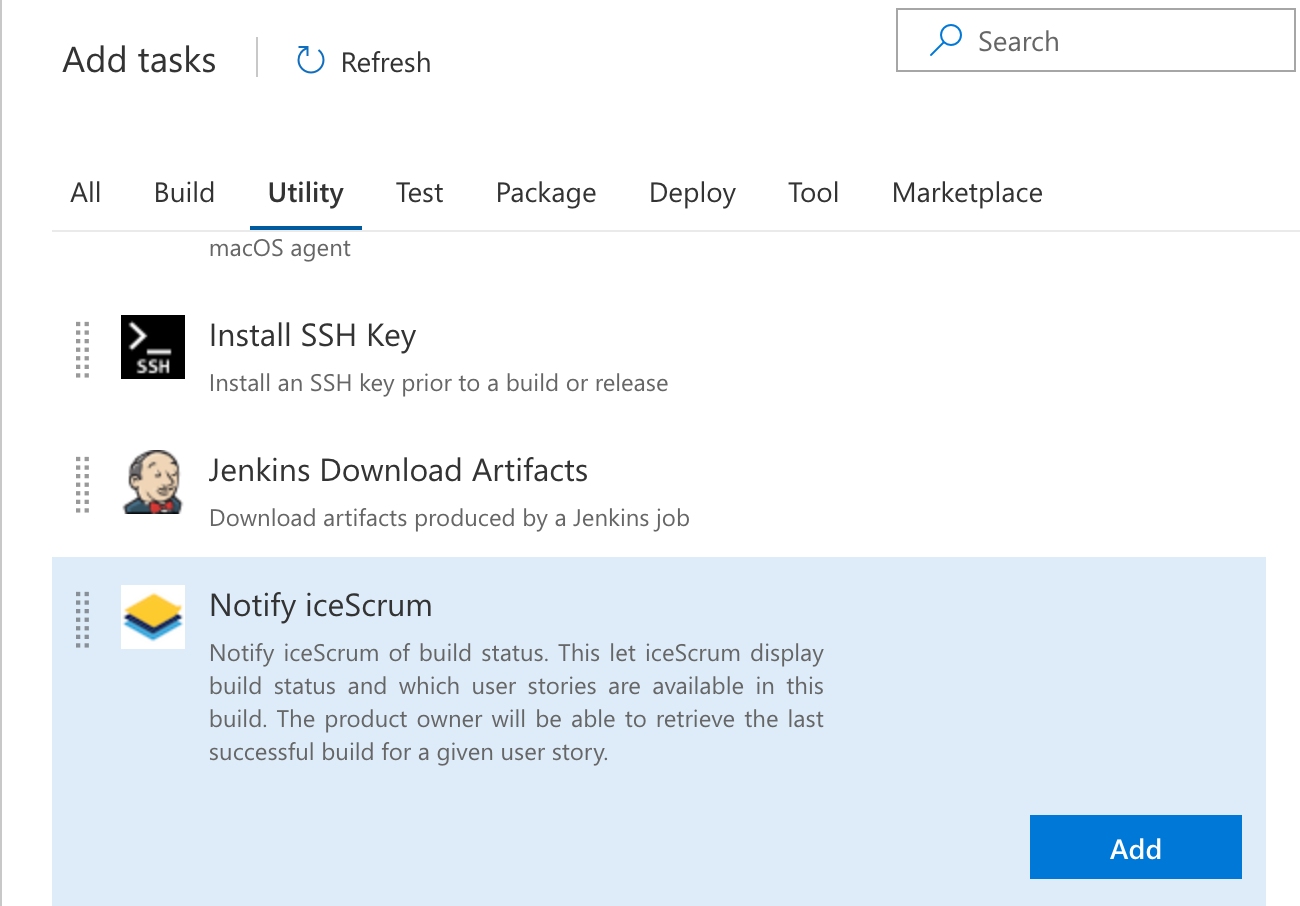
The notify iceScrum task should be added at the end of your last build phase.
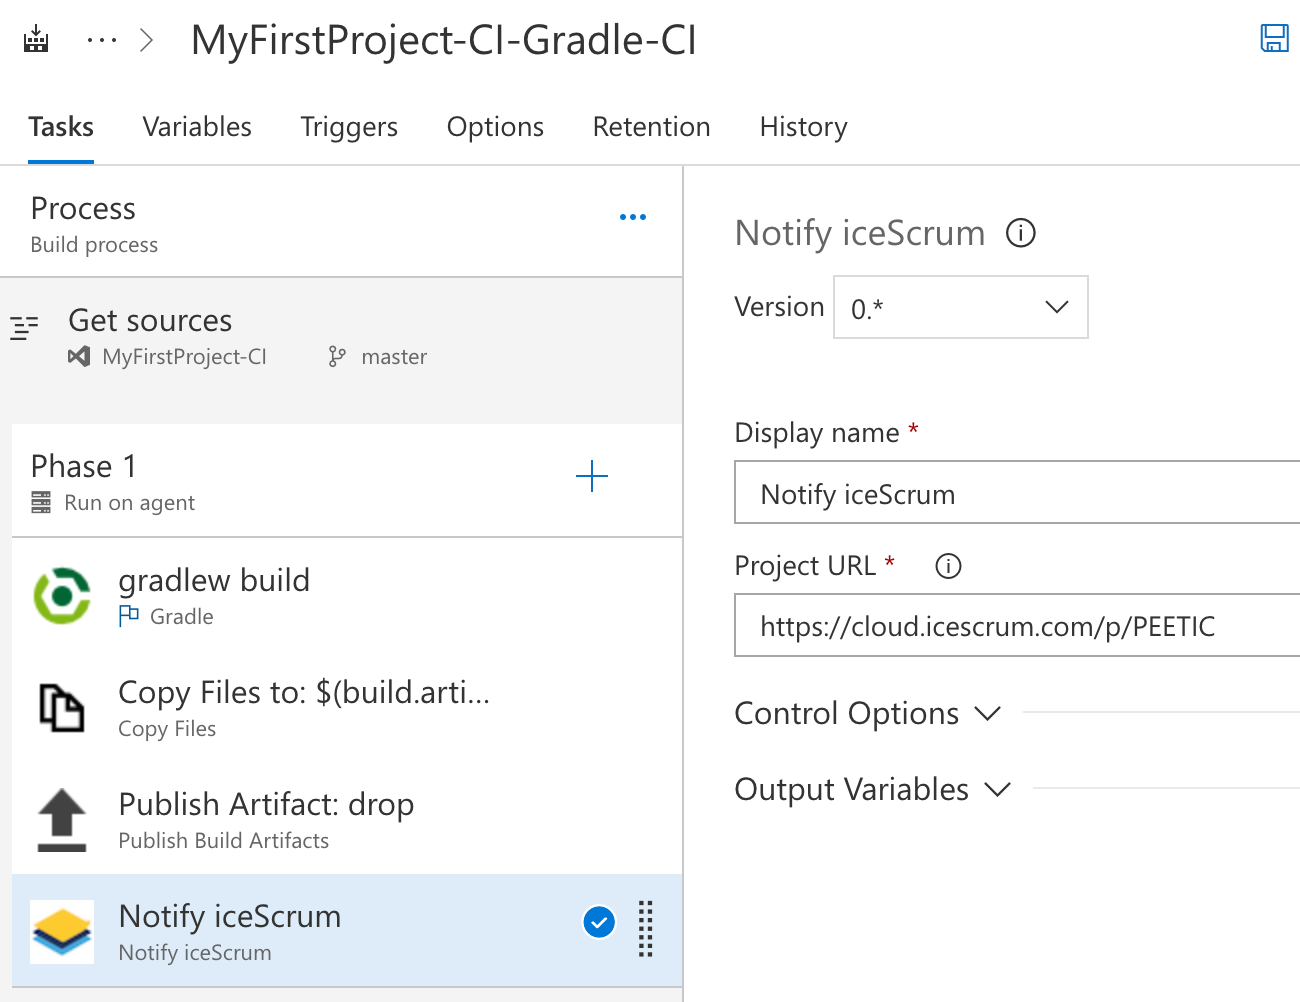
Your iceScrum project URL is:
$server/p/$project
If you use iceScrum Cloud, the URL will be:
https://cloud.icescrum.com/p/$project
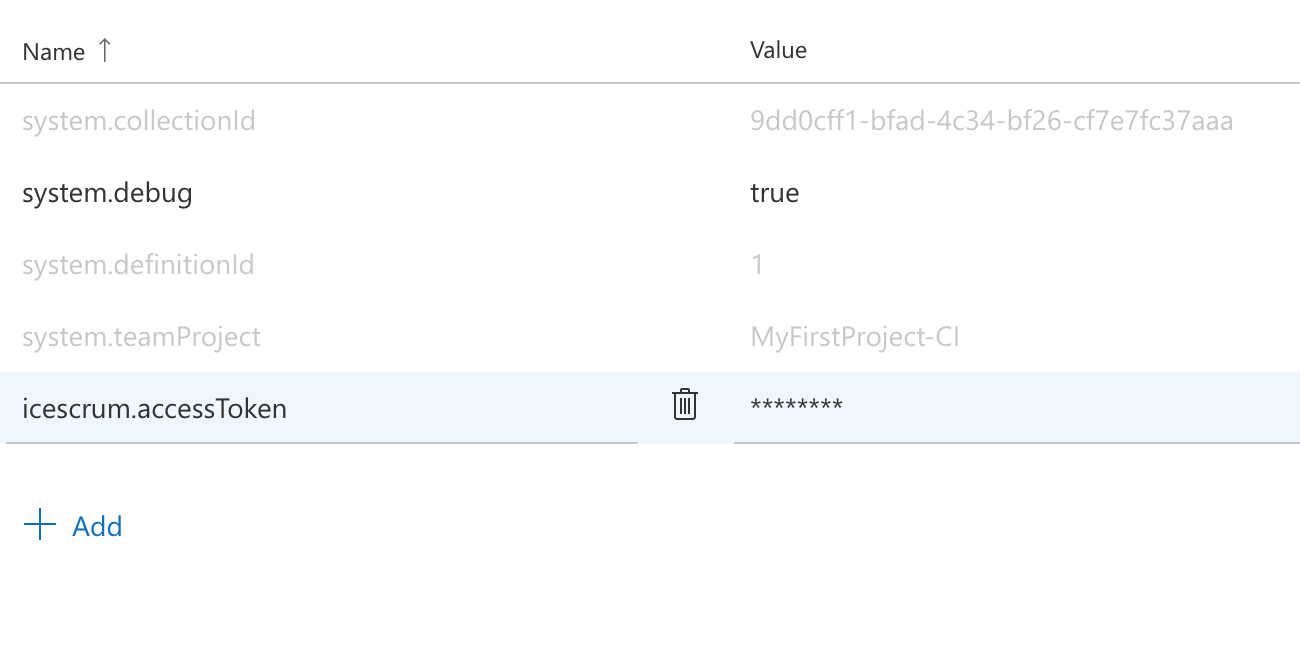
iceScrum now uses API tokens for web service authentication. Learn to generate an iceScrum API token.
The iceScrum access token must be configured as a process variable icescrum.accessToken. Add the variable and click the lock to make sure the token is securely stored.
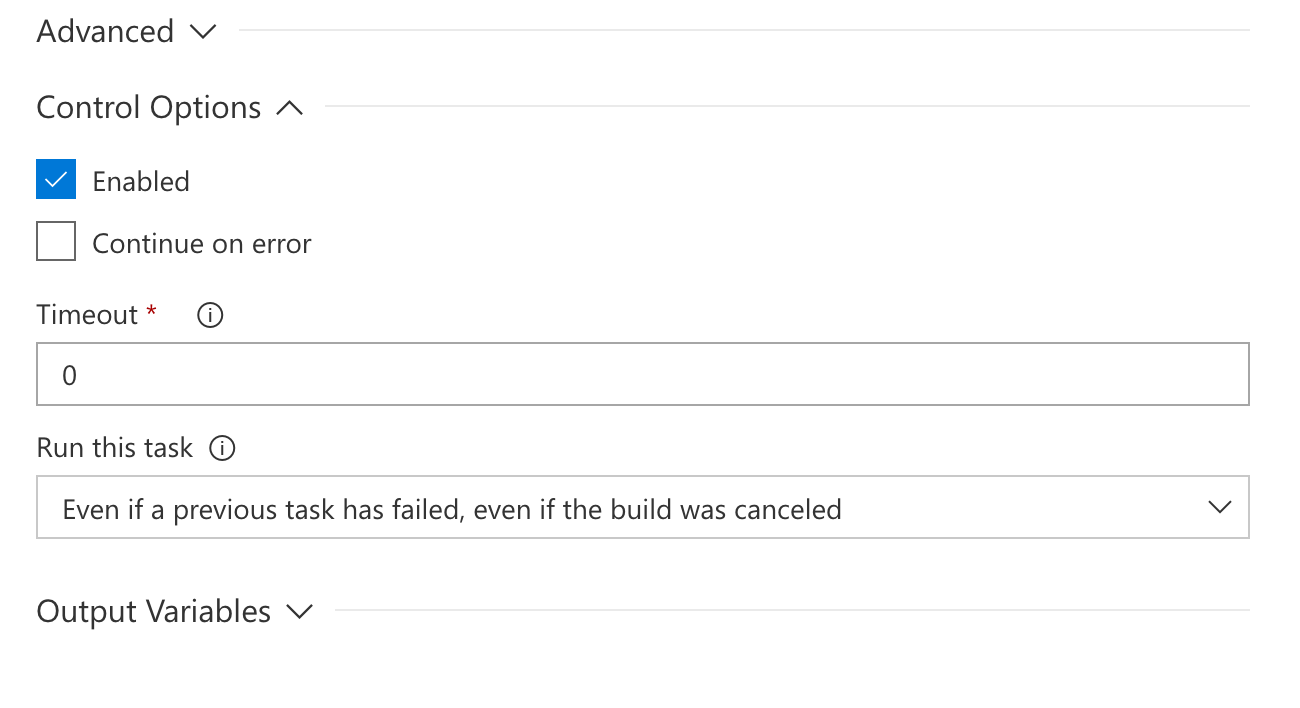
The control option must be set to run this task Even if a previous task has failed, even if the build was canceled. This let iceScrum display cancelled and failed builds.
Do not forget to save the build definition.